Denali Aire Window Air Conditioner Manual: A Comprehensive Guide
Denali Aire window air conditioners offer efficient cooling solutions for various spaces. This manual provides detailed instructions for installation, operation, maintenance, and troubleshooting, ensuring optimal performance and longevity of your unit.
Denali Aire window air conditioners are designed to provide reliable and efficient cooling for residential and commercial spaces. These units combine powerful performance with user-friendly features, offering a comfortable indoor climate during warmer months. Denali Aire prioritizes energy efficiency, incorporating technologies to minimize power consumption while maximizing cooling output.
This manual serves as a comprehensive guide to understanding, installing, operating, and maintaining your Denali Aire window AC unit. Whether you’re a first-time user or familiar with air conditioning systems, this resource will provide valuable insights into maximizing the lifespan and effectiveness of your appliance. From initial setup to troubleshooting common issues, we aim to equip you with the knowledge needed for a seamless cooling experience. Explore the features and benefits of your Denali Aire unit today!
Understanding Your Model Number
Your Denali Aire window AC unit’s model number is crucial for identifying specific features, specifications, and accessing relevant support resources. This alphanumeric code, typically found on the unit’s exterior or a label affixed to the side, provides detailed information about your particular model.
The model number helps determine the BTU rating, voltage requirements, dimensions, and refrigerant type used in your unit. When contacting customer support or ordering replacement parts, having the model number readily available ensures accurate assistance. It also allows you to download the correct user manual and access model-specific troubleshooting guides. Refer to the product packaging or the unit itself to locate your unique model number for future reference and optimal product support from Denali Aire.
Safety Precautions & Warnings
Important safety guidelines must be followed when installing and operating your Denali Aire window air conditioner. Always disconnect the unit from the power source before cleaning or performing maintenance. Never operate the AC with a damaged power cord or plug. Ensure the window is securely closed and locked around the unit to prevent accidental falls.
Avoid obstructing the airflow around the unit, and keep flammable materials away from the air conditioner. Do not attempt to repair the unit yourself; contact qualified service personnel for assistance. This appliance is not intended for use by individuals with reduced physical, sensory, or mental capabilities without supervision. Denali Aire is not liable for damages resulting from improper use or failure to follow these safety precautions.

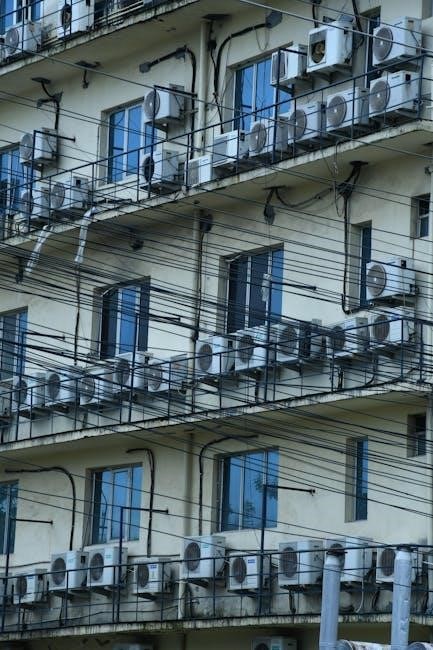
Installation Guide
Proper installation is crucial for optimal performance. This section details preparing the window, securing support brackets, and safely positioning the Denali Aire unit within the frame.
Preparing the Window for Installation
Before installing your Denali Aire window air conditioner, careful window preparation is essential for a secure and efficient setup. Begin by ensuring the window frame is structurally sound and capable of supporting the unit’s weight. Clean the window sill and track thoroughly, removing any debris, dust, or old weather stripping that could compromise the seal.
Measure the window opening to confirm it falls within the acceptable size range specified for your model. Check for any obstructions, such as screens or curtains, and remove them. If necessary, install a window stop or support to prevent the window from accidentally closing while the air conditioner is in operation.
Inspect the window for gaps or cracks and seal them with weather stripping or caulk to minimize air leakage and maximize cooling efficiency. A properly prepared window ensures a tight fit, preventing energy loss and contributing to optimal performance of your Denali Aire unit.
Installing Support Brackets
Securely installing the support brackets is crucial for the safe and stable operation of your Denali Aire window air conditioner. Typically, these brackets attach to the window sill using screws – ensure you’re using appropriate screws for your window material (wood, vinyl, or metal).
Position the brackets according to the manual’s diagram, ensuring they are level and aligned with the air conditioner’s side panels. Pre-drilling pilot holes can prevent splitting the sill, especially with wood frames. Once positioned, firmly screw the brackets into place, verifying they can withstand the unit’s weight.
Double-check bracket stability before proceeding. Some models may include additional support features like adjustable legs or foam padding; utilize these as directed. Properly installed brackets prevent accidental falls and contribute to quieter operation by minimizing vibrations. A solid bracket foundation is paramount for long-term reliability.
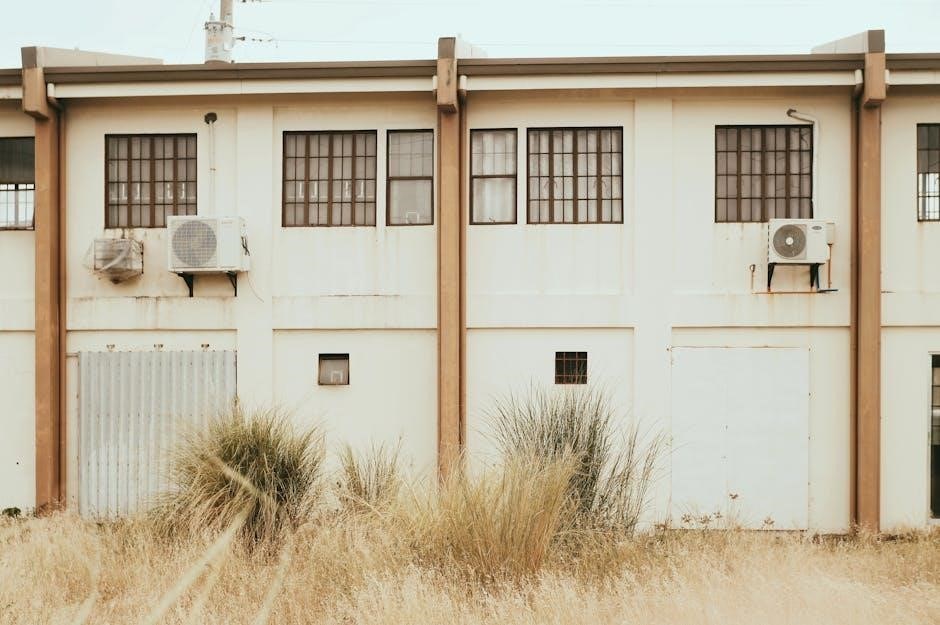
Securing the Air Conditioner in the Window
With the support brackets firmly in place, carefully lift the Denali Aire air conditioner and position it onto the brackets. Ensure the unit sits flush and is properly aligned within the window opening. Most models feature side panels that extend outwards; these should rest securely on the brackets.

Next, utilize the provided window sash locks or adjustable side panels to firmly secure the air conditioner to the window frame. These mechanisms prevent the unit from shifting or falling. Tighten all screws and locking mechanisms, but avoid over-tightening, which could damage the window or the unit itself.
Inspect the installation thoroughly, verifying there are no gaps or points of instability. A properly secured unit minimizes noise, maximizes cooling efficiency, and, most importantly, ensures safety; Consider adding foam insulation around the perimeter to seal gaps and further enhance performance.
Electrical Connection Requirements
Denali Aire window air conditioners require a dedicated electrical circuit, typically a standard 115/120-volt, 60Hz outlet. Avoid using extension cords or multi-outlet adapters, as they can overload the circuit and pose a fire hazard. Verify the outlet is in good working condition and properly grounded.
Before plugging in the unit, confirm the electrical specifications on the air conditioner’s nameplate match your household supply. Some larger BTU models may require a 230-volt outlet; ensure compatibility before connecting. A dedicated circuit prevents interference from other appliances.

Always plug the air conditioner directly into a wall outlet. If you are unsure about your electrical system, consult a qualified electrician. Improper electrical connection can void the warranty and create a dangerous situation. Follow all local electrical codes and safety regulations.

Operating Instructions
Denali Aire units are designed for user-friendly operation. This section details powering the unit on/off, selecting cooling modes, adjusting temperature, and controlling fan speeds for optimal comfort.
Powering On and Off
Denali Aire window air conditioners are straightforward to power on and off. Locate the power button, typically found on the control panel of the unit or on the remote control. Pressing this button once will initiate the power-on sequence, and the unit will begin operating based on your previously selected settings.
To turn the unit off, simply press the power button again. The unit will gradually cease operation, and the display will turn off. Ensure the unit is completely powered down before performing any maintenance or adjustments. Some models feature an automatic restart function; if power is interrupted, the unit will resume operation with the prior settings once power is restored.
Always disconnect the power cord from the electrical outlet when cleaning or storing the air conditioner for extended periods. This precaution ensures safety and prevents accidental activation.
Mode Selection (Cool, Fan, Dry, Auto)
Denali Aire window AC units offer versatile operation through multiple modes. The “Cool” mode provides standard air conditioning, reducing room temperature. “Fan” mode circulates air without cooling, ideal for ventilation. “Dry” mode, or dehumidify, removes moisture from the air, enhancing comfort in humid conditions.
“Auto” mode intelligently adjusts cooling and fan speed based on room temperature, maintaining a consistent climate. To select a mode, use the “Mode” button on the control panel or remote control. Each press cycles through the available options. The currently selected mode is typically indicated on the display panel.
Experiment with each mode to determine the best setting for your comfort level and specific environmental needs. Proper mode selection optimizes energy efficiency and ensures optimal performance of your Denali Aire unit.
Temperature Control & Settings
Denali Aire window air conditioners allow precise temperature control for personalized comfort. Utilize the “Temp Up” and “Temp Down” buttons on the control panel or remote to adjust the desired room temperature. The set temperature will be displayed on the unit’s digital display.
The temperature range typically spans from 60°F to 80°F (16°C to 27°C), though this may vary by model. For optimal energy efficiency, avoid setting the temperature excessively low. A moderate temperature difference between the indoor and outdoor environments is recommended.
Some models feature a “Turbo” or “Quick Cool” setting for rapid cooling. Remember that achieving the set temperature depends on factors like room size, insulation, and external temperature. Regularly adjust settings to maintain your preferred comfort level with your Denali Aire unit.
Fan Speed Adjustment
Denali Aire window air conditioners offer multiple fan speed settings to customize airflow and comfort. Typically, you’ll find options like Low, Medium, and High, controlled via buttons on the unit’s control panel or the remote control; The “Fan Only” mode operates the fan without cooling, providing simple air circulation.
Lower fan speeds are quieter and consume less energy, ideal for gentle cooling or maintaining a consistent temperature. Higher fan speeds deliver stronger airflow for quicker cooling, particularly in larger rooms or during hot weather. Experiment with different settings to find the balance between comfort and energy efficiency.
Some advanced models may include an “Auto” fan speed, which automatically adjusts airflow based on the temperature difference. Regularly adjusting the fan speed ensures optimal performance from your Denali Aire air conditioner.

Maintenance & Troubleshooting
Regular maintenance ensures peak performance and extends the life of your Denali Aire unit. This section details cleaning procedures and solutions for common operational issues.
Cleaning the Air Filter
Maintaining a clean air filter is crucial for efficient operation and air quality. A dirty filter restricts airflow, reducing cooling performance and potentially damaging the unit. Denali Aire recommends cleaning the air filter at least every two weeks, or more frequently during periods of heavy use or dusty conditions.
To clean the filter: First, power off and unplug the air conditioner. Locate the filter grille, usually on the front panel. Gently remove the air filter. You can wash the filter with mild soap and warm water, ensuring it’s thoroughly rinsed and completely dry before reinstalling. Alternatively, a vacuum cleaner with a brush attachment can be used to remove dust and debris. Never operate the air conditioner without a filter installed, or with a damp filter. Reinstall the dry filter securely into its slot, ensuring proper alignment.
Cleaning the Coils
Regularly cleaning the condenser and evaporator coils is essential for maintaining optimal cooling efficiency. Dust and debris accumulation on the coils hinders heat transfer, forcing the unit to work harder and consume more energy. Denali Aire suggests cleaning the coils at least once a year, or more often if the unit is exposed to particularly dusty environments.
To clean the coils: First, disconnect the power supply. Carefully remove the outer casing to access the coils; Use a soft brush attachment on a vacuum cleaner to gently remove loose dust and dirt. For stubborn grime, a commercially available coil cleaner can be applied, following the manufacturer’s instructions carefully. Avoid bending the delicate fins during cleaning. Ensure the coils are completely dry before reassembling the unit and restoring power. Clean coils contribute to improved performance and extended lifespan.
Draining Water (If Applicable)
Some Denali Aire window AC units, particularly those with dehumidifying functions, may accumulate water during operation. This water collects in a drain pan and, if not properly managed, can lead to leaks or mold growth. Regularly checking and draining this water is crucial for preventing issues.

To drain the water: Locate the drain plug, typically found at the base of the unit, often accessible from the exterior. Place a shallow pan or container beneath the plug to catch the water. Carefully remove the plug, allowing the water to drain completely. Ensure the unit is powered off before draining. Replace the plug securely after draining. If your model has a continuous drain option, ensure the drain hose is properly positioned and unobstructed. Proper drainage maintains hygiene and prevents water damage.
Troubleshooting Common Issues ⎼ Unit Not Cooling

If your Denali Aire window AC unit isn’t cooling effectively, several factors could be at play. First, verify the unit is properly plugged in and the circuit breaker hasn’t tripped. Check the air filter; a dirty filter restricts airflow, hindering cooling performance – clean or replace it. Ensure the temperature setting is lower than the room temperature and the unit is set to ‘Cool’ mode.
Inspect the condenser coils for dirt or debris, cleaning them if necessary. Confirm the window is sealed correctly to prevent warm air from entering. If the unit cycles on and off frequently, it might be oversized for the room. If the problem persists, there may be a refrigerant leak or compressor issue, requiring professional service.
Troubleshooting Common Issues ౼ Unit Making Noise
Unusual noises from your Denali Aire window AC unit can indicate several issues. A rattling sound often suggests loose components – check the fan, screws, and support brackets, tightening them as needed. Humming could stem from the compressor, which is normal, but excessive humming might signal a problem requiring professional attention. Clicking sounds frequently indicate a relay issue within the unit.
If you hear a buzzing noise, it could be due to a blocked fan or debris hitting the blades. Ensure nothing obstructs the fan’s path. Vibrations can be minimized by ensuring the unit is securely installed in the window. Persistent or loud noises should be addressed by a qualified technician to prevent further damage or safety hazards.
Troubleshooting Common Issues ⎼ Error Codes
Denali Aire window AC units utilize error codes to diagnose internal problems. If your unit displays an error code, consult this section for potential solutions. Error code E1 typically indicates a sensor malfunction, requiring professional service. E2 often signals a compressor issue, also necessitating a technician’s expertise. An E3 code usually points to a fan motor failure, potentially requiring replacement.
Error code E4 may suggest a refrigerant leak, a serious issue demanding immediate attention from a qualified HVAC professional. If the display shows E5, it could mean an overcurrent protection activation; check the power supply and circuit breaker. Always disconnect the unit before attempting any troubleshooting. If the error persists after checking basic connections, contact Denali Aire customer support for further assistance and avoid attempting complex repairs yourself.
Advanced Features & Settings
Denali Aire units boast features like remote control operation, sleep mode for comfortable nighttime cooling, programmable timers, and energy-saving modes for efficient performance.
Using the Remote Control
Your Denali Aire window air conditioner comes equipped with a convenient remote control, enhancing usability and allowing adjustments from across the room. To begin, ensure the remote has fresh batteries installed. Point the remote directly at the air conditioner’s control panel for optimal signal transmission. The remote replicates most functions available on the unit itself, including power on/off, mode selection (Cool, Fan, Dry, Auto), temperature adjustment, and fan speed control.
Utilize the “Timer” buttons to schedule operation, setting desired start and stop times. The “Sleep” function gradually increases the temperature overnight for comfortable sleep. Some models feature a “Swing” button to adjust the louvers for wider air distribution. If the remote isn’t responding, double-check the batteries and ensure there are no obstructions between the remote and the unit. Refer to the remote’s diagram within this manual for specific button functions;
Sleep Mode Functionality
Denali Aire’s Sleep Mode is designed to provide a comfortable sleeping environment while optimizing energy efficiency. When activated, this mode gradually increases the set temperature over a period of time – typically several hours – preventing excessive cooling during the night. This eliminates sudden temperature fluctuations that can disrupt sleep and reduces energy consumption.
To engage Sleep Mode, simply press the designated “Sleep” button on either the air conditioner unit or the remote control. The display will usually indicate Sleep Mode is active. The rate of temperature increase is pre-programmed and cannot be adjusted. Sleep Mode automatically terminates after a set duration, returning the unit to its previously selected settings. It’s an ideal feature for bedrooms or any space where consistent, moderate cooling is desired throughout the night, promoting restful sleep and cost savings.
Timer Settings
Denali Aire window air conditioners feature versatile timer settings, allowing for automated operation and enhanced convenience. These settings enable you to schedule the unit to turn on or off at specific times, optimizing comfort and energy usage. Typically, there are two timer options: an “On” timer and an “Off” timer.
The “On” timer lets you set a future time for the unit to automatically power on, pre-cooling your space before you arrive. The “Off” timer allows you to schedule the unit to turn off after a specified duration or at a particular time, preventing unnecessary operation. To set the timer, use the “Timer” button on the control panel or remote. Follow the on-screen prompts to input your desired time. Proper timer utilization can significantly reduce energy costs and ensure a comfortable environment tailored to your schedule.
Energy Saving Tips
Denali Aire window air conditioners are designed for efficient cooling, but maximizing energy savings requires mindful usage. Begin by ensuring proper insulation in your room – sealing windows and doors prevents cooled air from escaping. Utilize the unit’s timer function to avoid running it when you’re not present, scheduling operation only during occupied hours.
Regularly clean the air filter; a clogged filter forces the unit to work harder, consuming more energy. Consider using the “Dry” mode in humid conditions, as it uses less energy than “Cool” mode. When possible, position the unit away from direct sunlight. Finally, explore the “Sleep” mode, which gradually increases the temperature overnight, providing comfortable sleep while minimizing energy consumption. Implementing these simple strategies will help you enjoy cool comfort while reducing your electricity bill.

Technical Specifications
Denali Aire units vary; specifications include BTU rating, voltage, power consumption, dimensions, weight, and refrigerant type. Refer to your model’s label for precise details.
BTU Rating & Cooling Capacity
Denali Aire window air conditioners are available in a range of BTU (British Thermal Unit) ratings, directly correlating to their cooling capacity. A higher BTU rating indicates a greater ability to remove heat from a room. Selecting the appropriate BTU for your space is crucial for efficient and effective cooling.
Generally, a BTU rating of 5,000-6,000 is suitable for rooms up to 150 square feet, 8,000-10,000 BTU for 250-350 square feet, and 12,000-14,000 BTU for 400-550 square feet. Factors like ceiling height, insulation, sun exposure, and the number of occupants can influence the required BTU.
Consult the product packaging or the unit’s label to determine its specific BTU rating and corresponding cooling capacity. Using an undersized unit will result in insufficient cooling, while an oversized unit may cycle on and off frequently, leading to inconsistent temperatures and reduced energy efficiency.
Voltage & Power Consumption
Denali Aire window air conditioners typically operate on standard household voltage, commonly 115V or 230V, depending on the model and region. Always verify the voltage requirement before plugging in the unit to avoid electrical damage. The unit’s label and this manual clearly state the required voltage.
Power consumption, measured in watts, indicates the amount of electricity the air conditioner uses. This varies based on the BTU rating, operating mode (cool, fan, dry), and fan speed. Higher BTU units generally consume more power;
To estimate monthly energy costs, multiply the unit’s wattage by the number of hours used per day, then divide by 1000 to convert to kilowatt-hours (kWh). Multiply the kWh by your local electricity rate. Utilizing energy-saving features like sleep mode and timers can significantly reduce power consumption and lower your electricity bill.
Dimensions & Weight
Denali Aire window air conditioner dimensions are crucial for ensuring a proper fit within your window opening. Accurate measurements prevent installation issues and maximize cooling efficiency. Dimensions typically include width, height, and depth, specified in inches or centimeters. Refer to the specific model’s specifications chart for precise measurements.
The weight of the unit is also a significant factor, particularly during installation. Heavier models may require additional support or assistance to safely secure them in the window. Weight is usually listed in pounds or kilograms.
Before purchasing, carefully measure your window opening and compare it to the air conditioner’s dimensions. Consider the added depth to ensure the unit doesn’t obstruct the window’s operation. Proper fit and secure mounting are essential for safe and effective operation.
Refrigerant Type
Denali Aire window air conditioners utilize refrigerants to facilitate the cooling process. Understanding the refrigerant type is important for both performance and environmental considerations. Modern Denali Aire units commonly employ R-410A, a hydrofluorocarbon (HFC) refrigerant that replaced older, ozone-depleting substances like R-22.
R-410A offers improved efficiency and reduced environmental impact compared to its predecessors. However, it’s crucial to note that refrigerants should only be handled by qualified technicians. Attempting to service the refrigerant system yourself can be dangerous and may void the warranty.
The refrigerant type is typically indicated on the unit’s nameplate or in the technical specifications. Proper refrigerant charge is essential for optimal cooling performance. If you suspect a refrigerant leak or experience reduced cooling capacity, contact a qualified HVAC professional for assistance.
Leave a Reply